Author Archive
This is one of my latest projects for a client in Chester.
Another strip, line, emulsion job which is getting more and more popular and preferred to re-plastering due to the lack of mess. When done properly, lining a room can look fantastic.


As with every decorating project preparation is so important. Fail to prepare – prepare to fail! Always a good motto to remember when decorating.
Lining paper comes in so many forms and thicknesses (grades) these days. From a standard 800 grade roll to heat-saving under-liners and sound insulating liners, there are so many to choose from that it would be foolish to overlook this option when considering a decorating project. On this project, 1400 grade standard lining paper was used (with no filling on the joints). Filling at the joints will create a weak spot and can eventually crack and fail, showing every seam.
Walls lined and time for the emulsion. My client has decided on Farrow & Ball’s Joa’s White (no 226) Estate emulsion which gives a lovely chaulky finish but is rather expensive so is not for the faint hearted (£75 per 5 litre tin). It is a top quality paint that some decorators don’t like using but I really like it. It’s so much nicer to use than the standard Dulux stuff you buy in the big sheds, and the colours are fantastic!


After 2 coats of brilliant white on the ceiling and 2 coats of the F&B emulsion on the walls with all woodwork undercoated and glossed in brilliant white acrylic low VOC paint this is how it looked.


Another very happy client!
Lee has just finished decorating our lounge, it is a work of art and we’re absolutely delighted with the transformation. It was a pleasure to have Lee in our home. He is very professional, honest and reliable and leaves everything so clean! Lee’s work is of the highest standard and he has such pride in his work. He plans and prepares work thoroughly, is meticulous with attention to detail and an absolute perfectionist – we are so pleased that we found him! We have no hesitation in recommending Lee for any painting and decorating work and will be using his services again in the next few months. Thank you so much Lee.
Mr & Mrs Andrade – Wrexham Road, Chester
This is a job that I have recently completed for a client of mine in Acton.
Have you ever lifted an ornament off your window ledge or moved a piece of furniture away from the wall and noticed the woodwork is more yellow than the rest? This is because solvent-based paints don’t like anywhere that has little, or no natural light coming in and since 2010 the problem has increased dramatically. Since January 2010 all solvent-based paint had to become ‘VOC Compliant’. Simply put, this means paint manufacturers have had to cut the solvent content of their paints in order to bring them into line with EU directives relative to Atmospheric Pollution. This has caused a huge headache for both professional decorators and homeowners across the UK. A solution to this problem is to use water-based products.
On this job the previous decorator had used solvent-based products on the woodwork and with very little natural light coming in the wood had yellowed very quickly looking more like magnolia than white as you can see in the first photo. On top of this the decorator did not abrade the surfaces properly or use an undercoat either so it was a case of gloss on gloss, meaning little or no adhesion whatsoever, as you can see from the second photo. The paint literally peeled off in sheets. Undercoat is always needed when a gloss finish is required so don’t be tempted to skip this stage or use ‘1 coat glosses’ or you’ll end up with a very costly and messy paint job next time around!


This property is a large 3 storey house so on the hall, stairs, landing we’re talking 16 doors/frames, skirting boards, handrails and over 50 spindles! A huge amount of time was spent sanding the woodwork down using my Festool dust-free sanding system to ensure that this time the job was done properly and that the paint would not peel off with your fingernail!
A water-based undercoat and gloss were applied to all surfaces to ensure that it stayed white this time.
This is the finished job.


This kitchen was hand painted by myself recently and is one of the biggest that I have undertook. This 27 year old, solid wood mahogany kitchen below consisted of 30 doors, 8 drawers, pelmet, cornice, plinth, end panels, exposed feature shelving with spindles and cooker hood. The brief from the customer was simple – To transform it into a light, bright, more modern looking kitchen.
The kitchen was really well made and the layout was perfect but the look had dated and with little natural light the dark mahogany colour was really dominating the space, making the area feel too dark. It was a choice between a new fitted kitchen for £10’s of thousands or a refurbish.
(Please click for larger image)
BEFORE


So I set to work on preparing all of the surfaces to be painted by sanding (using Festool dust extraction) and de-greasing. All worktop surfaces were fully protected by plastic and paper so not to throw up any dust like a cotton dust sheet could easily do. All doors and drawer fronts were removed ready for painting and on this kitchen the customer decided to change the handles so the old handles were taken off, holes were filled ready for new handles to be fitted at a later date.
DURING


After the 4 coats of paint had carefully been applied and everything was re-fitted this is how it looked, finished in a subtle but classy Little Greene Ivory eggshell. What a transformation! My client felt they had a brand new kitchen for a fraction of the cost of new.
AFTER


So you’re fed up with the dated old wallpaper that has been on your walls for the past 25 years or so but you know that underneath it lie hundreds of hairline cracks that will require a plasterer to put right. Well, there is an alternative solution, which is a lot less messy – Lining Paper.
Lining paper has so many uses. As well as being an essential step before hanging your expensive patterned wallpaper it can also be used as a finish paper itself, and then painted over. If done properly you should not see the joins and you will have plain, more modern looking walls that look as though they have been plastered – but without the mess! As with all decorating projects, preparation is paramount, lining paper is only paper after all. Time has to be spent preparing the surfaces properly and using the correct tools and materials is very important.
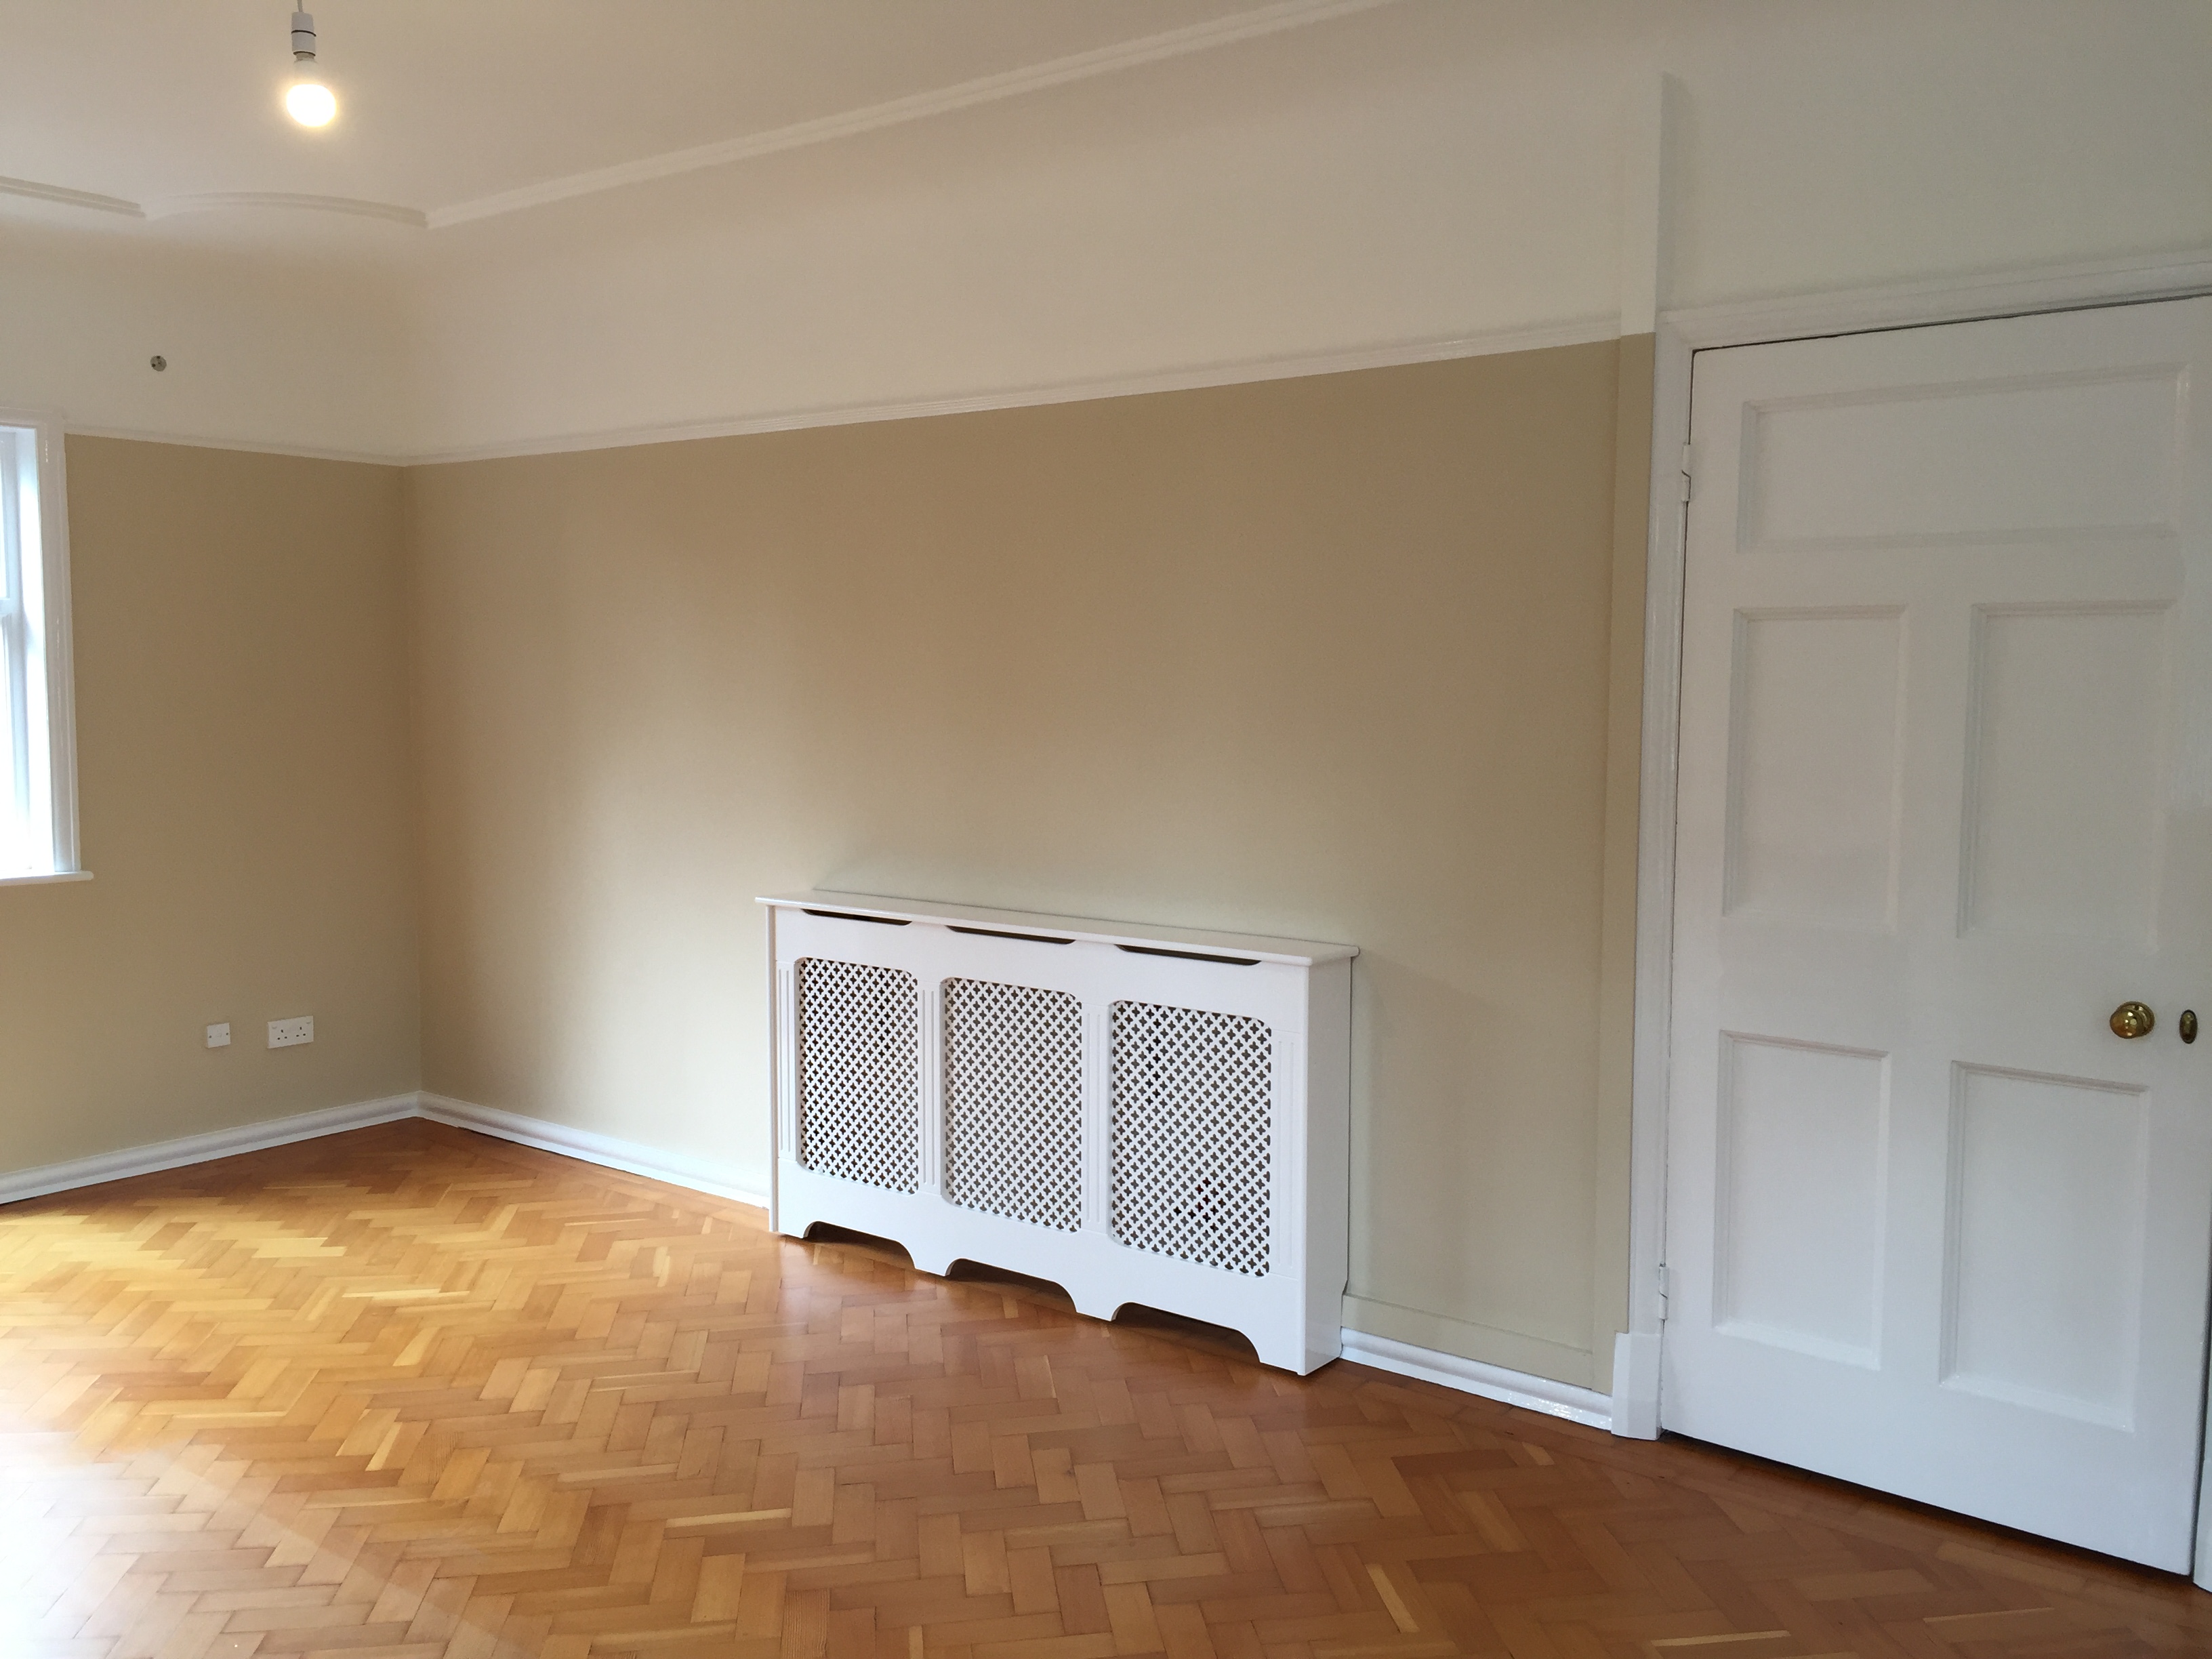
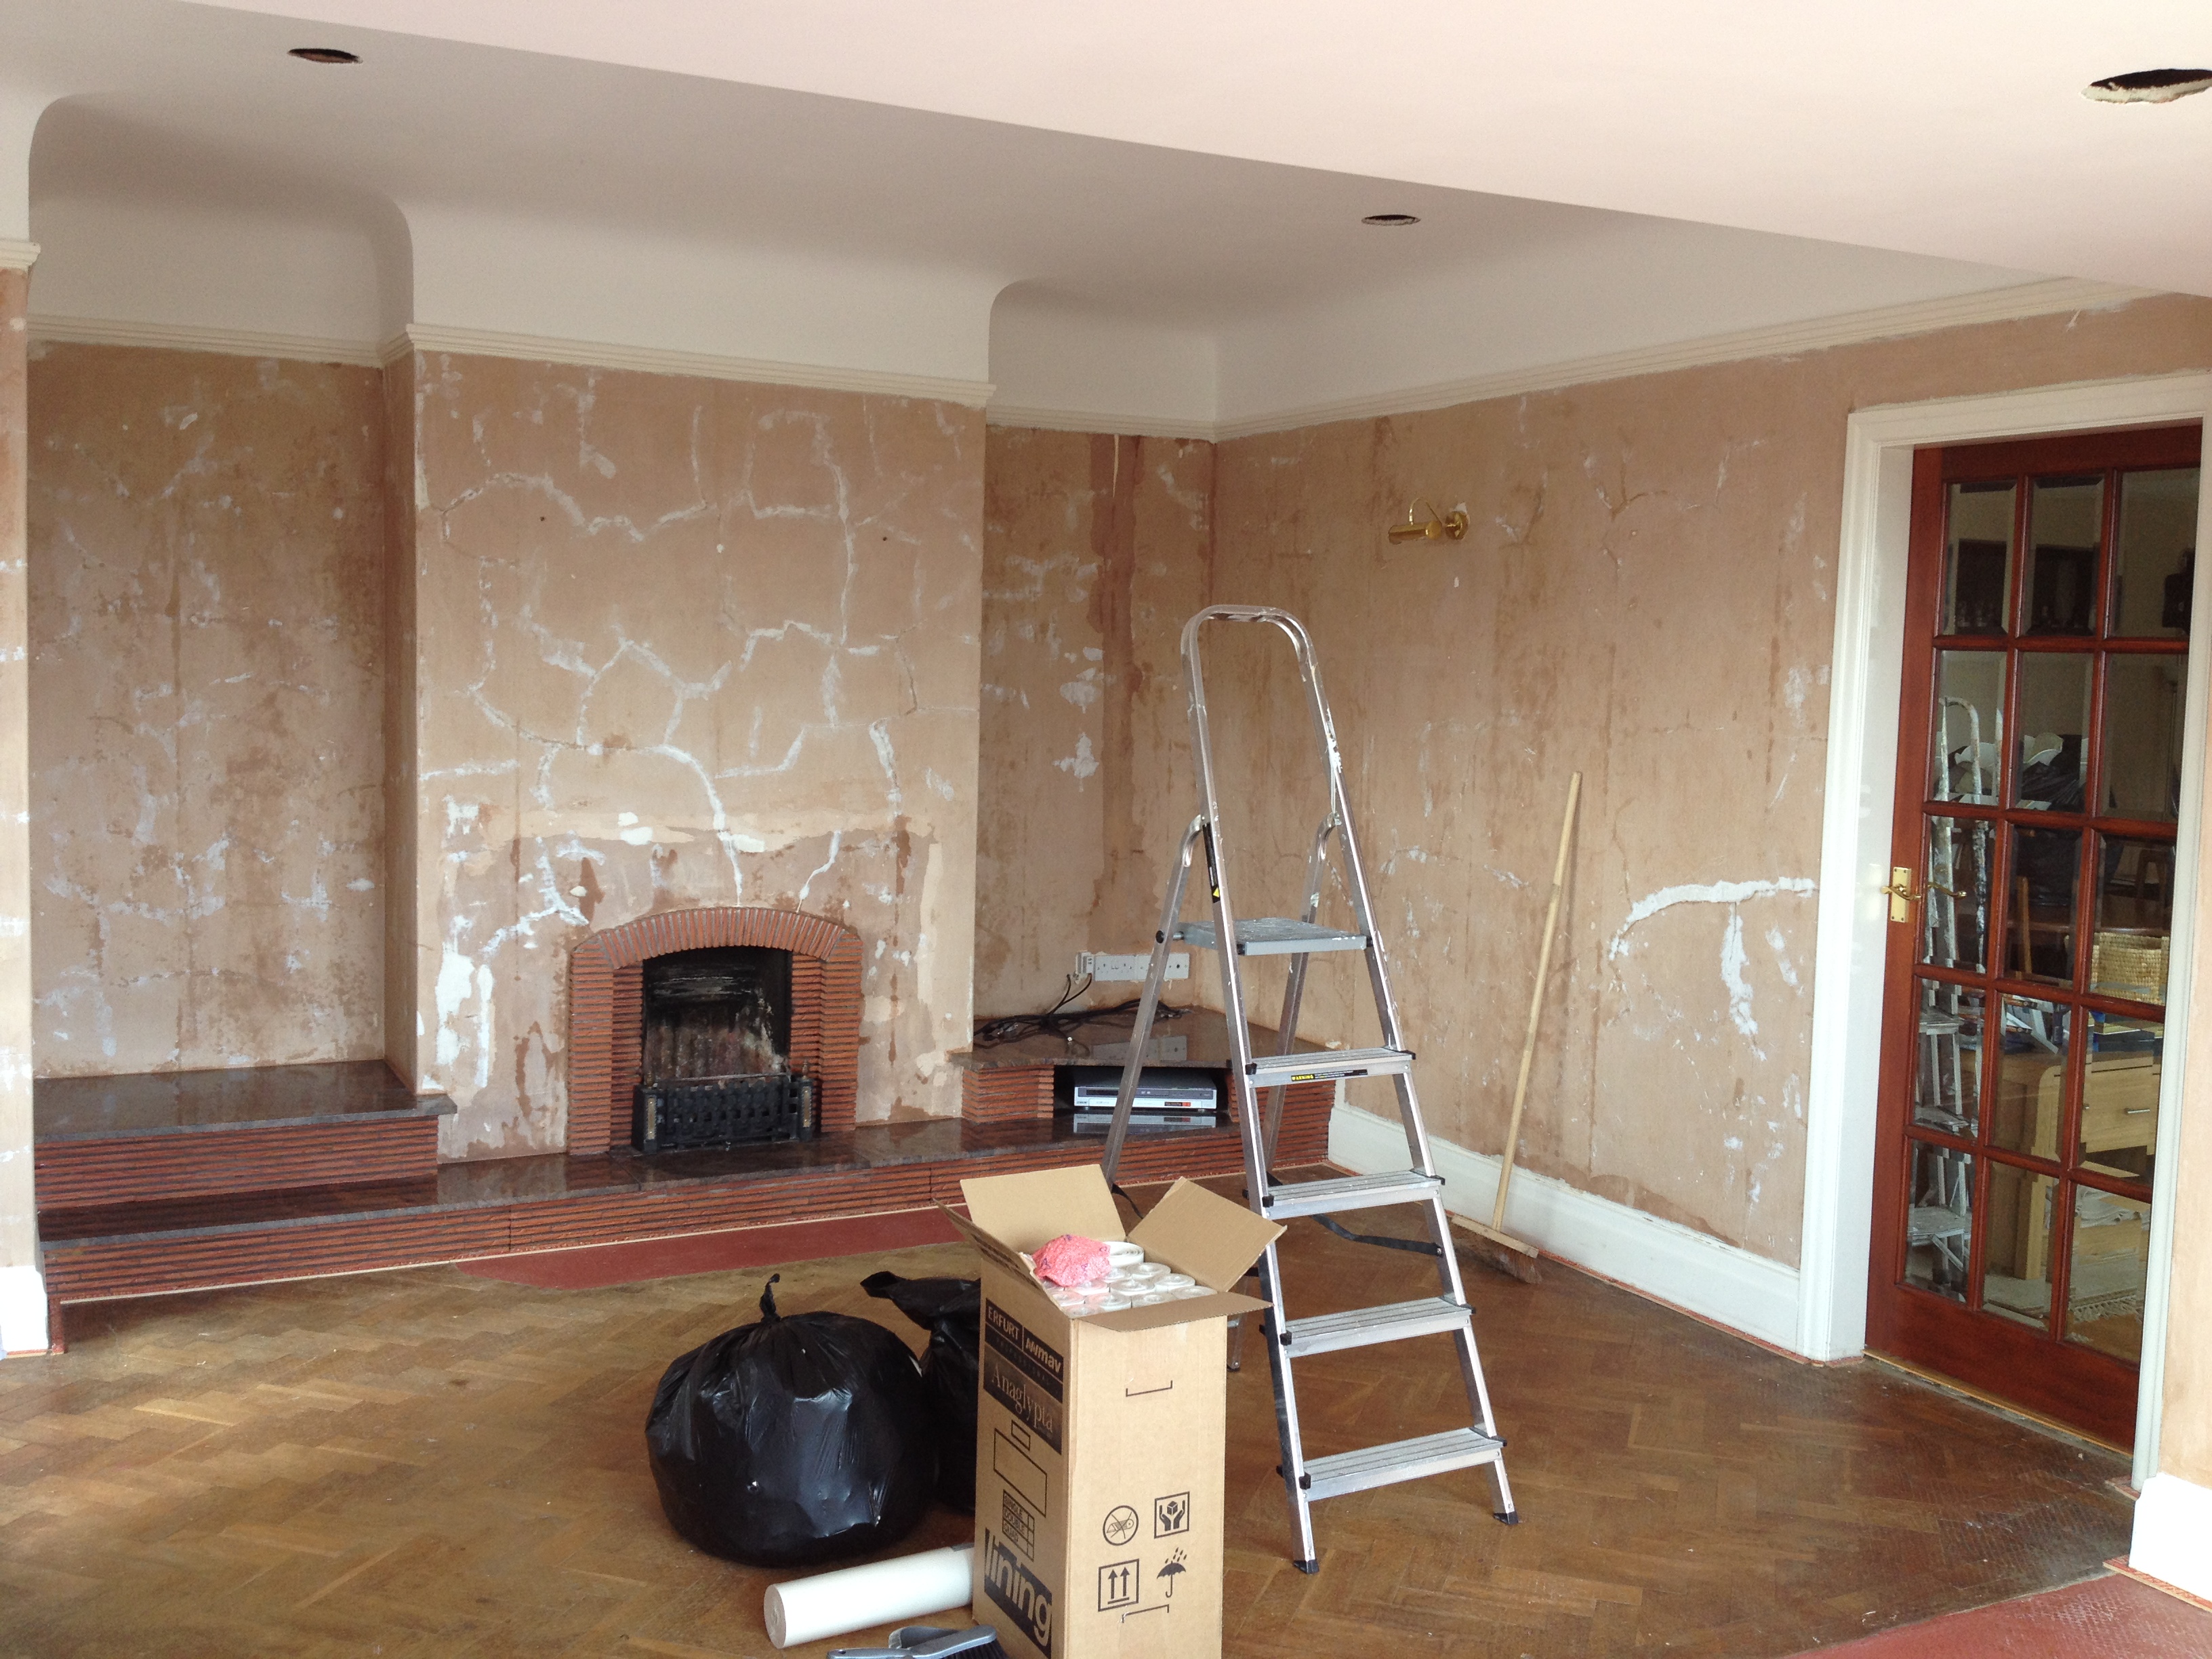
Below are some pictures of a job that I have recently done at Wynnstay Lane, Marford. These pictures will show you just what kind of finish can be achieved with the correct preparation.
As you can see from the first 2 pictures, there was a fair bit of preparation involved before any paper or paint even touched the walls.
(Please click for larger image)

These 2 pictures show you the end result, with no joins visible.


My client was extremely pleased with the end result – and no mess either.
‘Lee has just finished decorating our lounge which involved lining and emulsioning the walls, painting the woodwork and papering a feature wall. We are absolutely delighted with the quality of his work.’
Mr & Mrs Ridgway – Wynnstay Lane, Marford, Wrexham
From Pine to Paint
Are you tired of the old , dull looking pine furniture in your home? There is a solution, and it’s far cheaper than buying new.
Painted furniture is a fresh, clean and modern alternative. From a mirror to a full size wardrobe, I can provide you with a totally flawless finish on your furniture.
As with all decorating projects, if you want a top job that not only looks good but will also last, preparation is the key, and hand painted furniture is no different. Every piece of furniture that I hand paint will have at least 4 coats of paint applied, consisting of specialist primers, undercoats and topcoats with all necessary filling work done first. If you want new handles to be fitted to give a totally new look altogether, this can be done too.
Please take a look at some of the photo’s of a job I was recently asked to do for a family in Bwlchgwyn, Wrexham. The photo’s will give you an idea of the quality you can expect, and by this I mean a glass smooth, brush-mark free finish that will last for years.
(Please click for larger image)


All finished in a subtle but classy Farrow & Ball Joa’s White Estate eggshell.
My client was over the moon with the transformation.
‘I was particularly pleased with the paint-job on my bedroom furniture, which had been sound and solid but rather dark and dingy. My bedroom is now a light and bright retreat, and I believe the finish to be comparable to that of the very top-end bespoke furniture’
Mr & Mrs Davis – Bwlchgwyn, Wrexham
